


Ansible ?? If you are someone who is shifting to the DevOps world or someone who just wants to automate stuff, you would have come across the word Ansible. Well, you have come to the right place. In this blog, we will be learning what Ansible is and we will be doing some real stuff.

Don't worry it aint gonna be Dangerous ;)
What is Ansible?
Ansible is an open-source tool that is used to automate and orchestrate. It is used for software provisioning, configuration management and software deployment. It is popular for its simplicity of installation, ease of use and the lack of need for an agent. How does it work? Well before learning that let's learn a few terms used in ansible :
Ansible server: It is the machine on which ansible is installed and from which all the commands will be run.
Nodes: nodes are the client servers or remote systems on which we will be performing tasks from the server.
Inventory: It is a file that contains details about the hosts(nodes) such as the public IP addresses, private ssh key, username etc.
These terms are the most basic terms which you will come across while working with ansible so do keep them in mind. Okay, so how does it work? The ansible server is the control node which also contains the inventory file. The server basically connects to the nodes through an ssh connection. The cool thing is that you don't have to install ansible on those nodes. If you want to know more about it check out the documentation:https://docs.ansible.com/ansible/latest/getting_started/basic_concepts.html
Installation
For the installation, you can again refer to the docs
https://docs.ansible.com/ansible/latest/installation_guide/index.html
Let's get Dangerous!!!
Ok enough with the introduction, let's get practical since I believe in "learning by doing".
step 1:
We need to start up some instances for us to work on. You can choose any cloud provider, I chose Azure. You will have to create instances with any Linux distribution since ansible can only run on a control node with Linux. I'm not gonna go into details on how to spin up the instances but for Azure, you can create virtual machine instances using scale sets. Note: Remember to create inbound for allowing ssh traffic on port 22. Here is an image of the instances I created
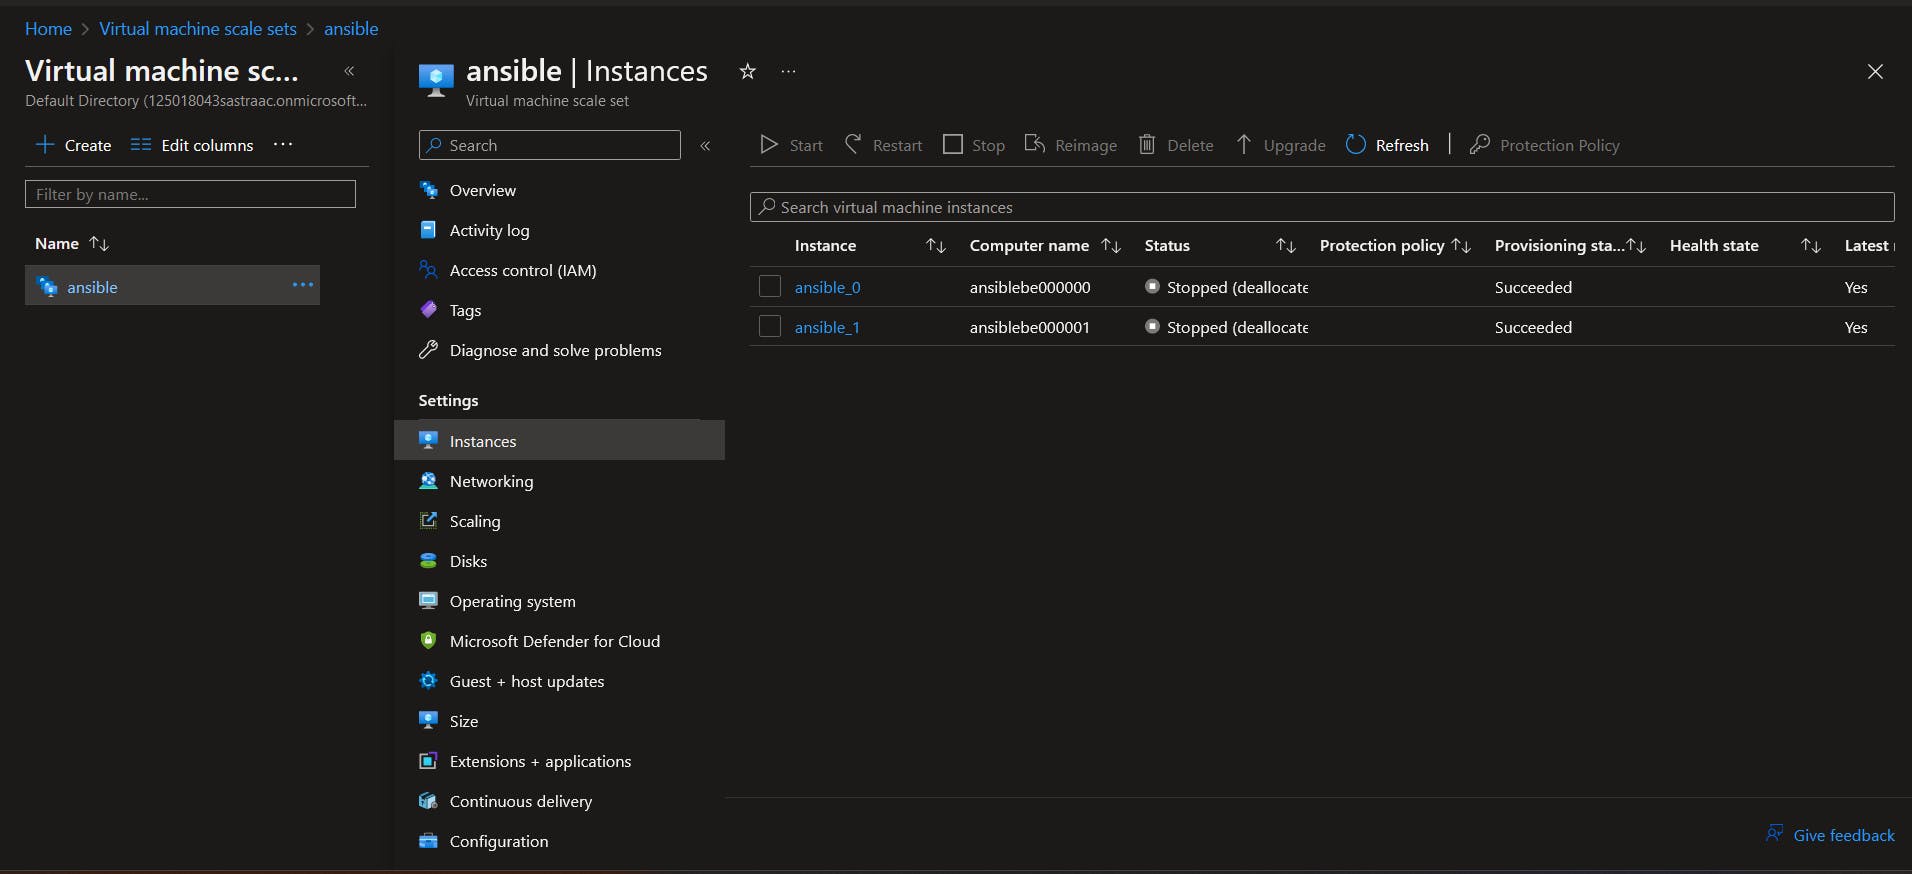
Now, if your instances are up and running, we are good to go. The next step would be to note the public IP addresses of both the nodes ( instances ) that you created. Also after the creation of the instances, a secret file will be downloaded which contains the ssh key for connecting to those instances.
step 2:
Open your terminal and open another 3 tabs and go to the directory where the ssh key is downloaded. Now ssh into those two instances in the other two tabs by writing
ssh -i <ssh key file name> user@ip-address
For azure the username was azureuser , if you are using another cloud provider do check out the username.
Now we need to create a user in those instances. Before creating the user switch to the root user by writing
sudo su
and then when you become a root user, write
adduser <username>
and then a password will be asked, type it and then your user will be created. After creating it, we need to give root privileges to the newly created user and to do that re-type sudo su and type
visudo
After typing that you will be taken to an editor, now go inside the file and add this :
Allow root to run any commands anywhere
root    ALL=(ALL)        ALL
<username> ALL=(ALL) NOPASSWD: ALL
Now your new user has root privileges. Become the user you created by typing su - username.
step 3:
Ok cool, let's get into the actual business. Go to the first terminal window where you did not connect to the instance. Now we need ansible to know the location of the remote machines (instances ), so how do we do that? Ansible uses something known as inventory to figure that out. You can have the inventory in two formats, one is in INI format and the other in YAML. Since this is a beginner blog we will be going with the INI format. To add hosts or IP addresses we will need to go to the hosts file which is present in the ansible folder in your system. Type this and go inside the file
nano /etc/ansible/hosts #you can use vim too if you are comfortable
When you go inside the file, you will see a lot of things being commented out, you can read them. So let's add our hosts to the inventory. We can add hosts either directly or inside a group. To define a group we will be writing the below and below the group, we will be adding our hosts. The hosts can be either an IP address or a domain.
[group]
120.0.0.7
192.168.72.2
As you know we need the ssh private keys to gain access to the instances and we also need to let ansible know what user we need to log in as, so how do we add them to the inventory file? You can add them by writing the following
[group]
120.0.0.7 ansible_ssh_private_key_file = <location> ansible_user=<username>
192.168.72.2 ansible_ssh_private_key = <location> ansible_user=<username>
Now imagine that there are 500 instances, are you gonna add the above in every host? That would not be efficient, so to solve this we use variables. We simply need to create a variable to store the private key and username and we can do that by writing the following
[group]
120.0.0.7
192.168.72.2

[group:vars]
ansible_ssh_private_key_file = <location>
ansible_user = <username>
Cool, when you are done with this, save the file and go back to the terminal. Now lets try some basic ad hoc commands in ansible. Ad hoc commands are commands which can be used to run specific tasks for one-time use only and it uses Linux commands to execute tasks. Ansible ad hoc commands are idempotent which means that no matter how many times you execute the command you will get the same output. Ok now go to the terminal and type
ansible <group_name> -a "ls"
The -a is an argument used to execute Linux commands. After typing the above you will get a result. Now let's create a file in the first instance only using the ad hoc command, type
ansible <group_name> -a "touch hello.txt"
Now go to the terminal where you connected to the first instance, then type ls , and you will see that the file has been created. We can also download stuff in the instances using ad hoc commands, lets try to download something interesting, type
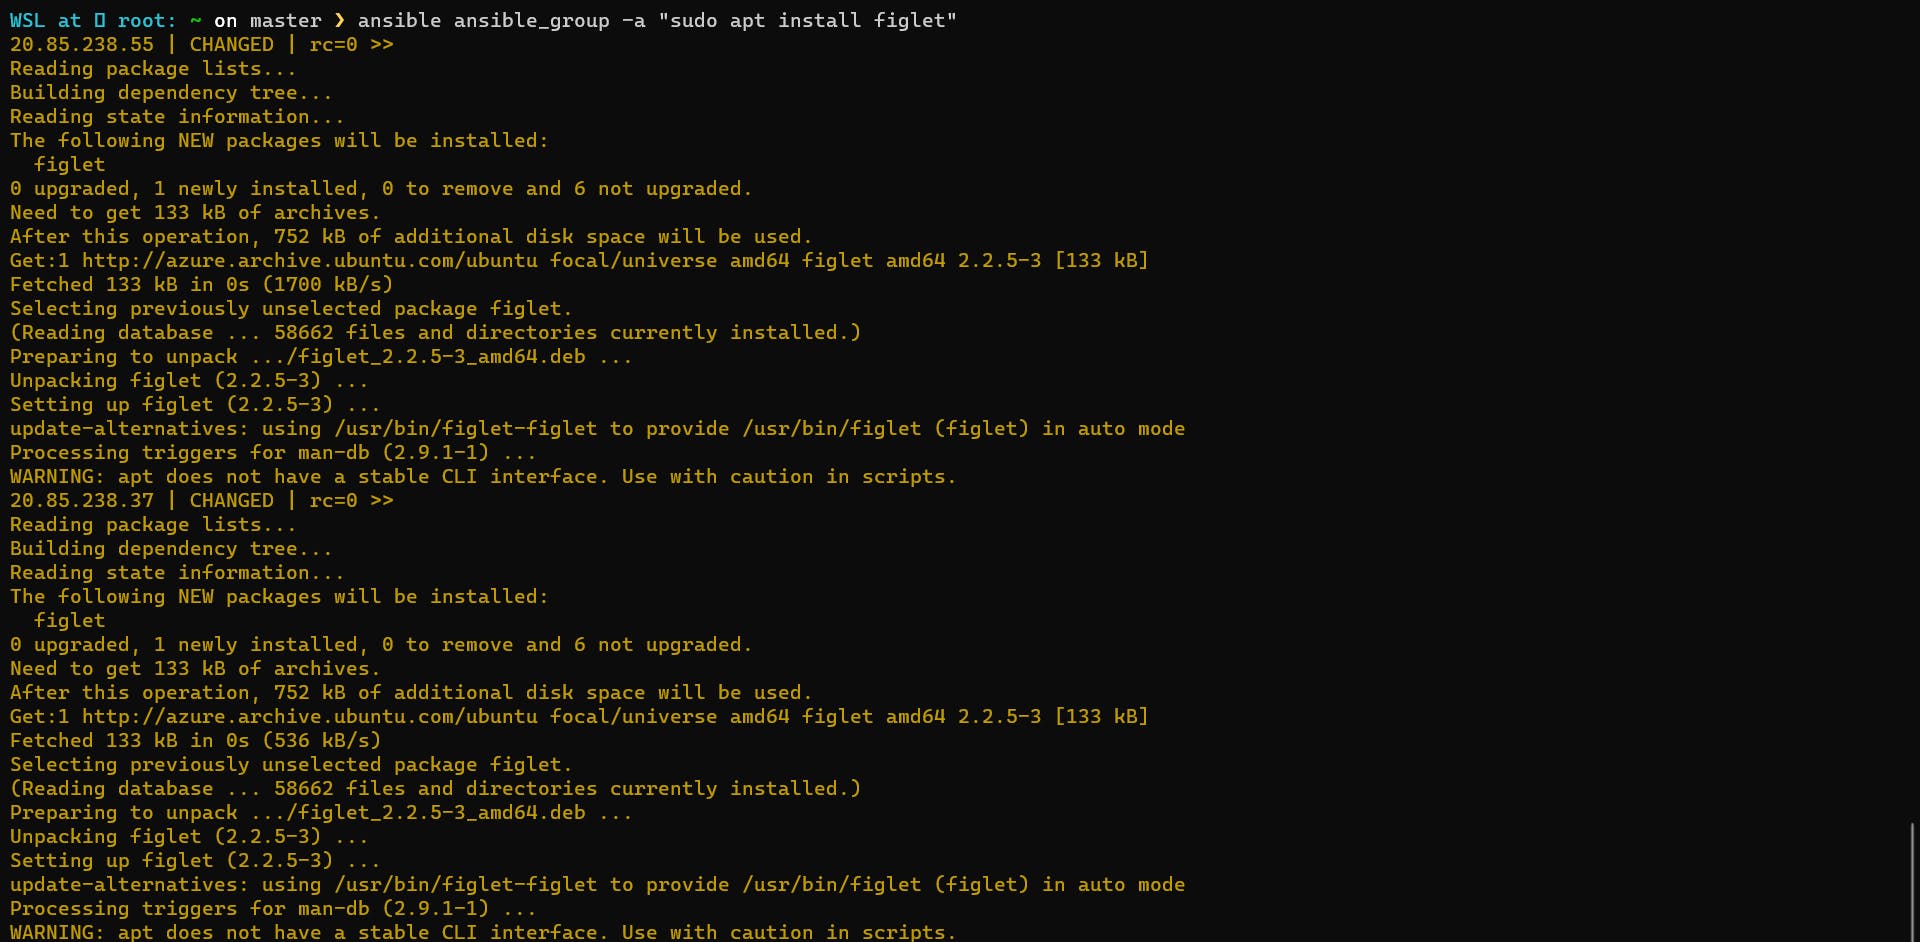
ansible <group_name> -a "sudo apt install figlet"
# or
ansible <group_name> -ba "apt install figlet" # the b in the argument performs the sudo functionality
After typing that you will get a result similar to the below image
Now type the following, and you will see something cool
ansible <group_name> -a "figlet ansible works , lesss gooo"
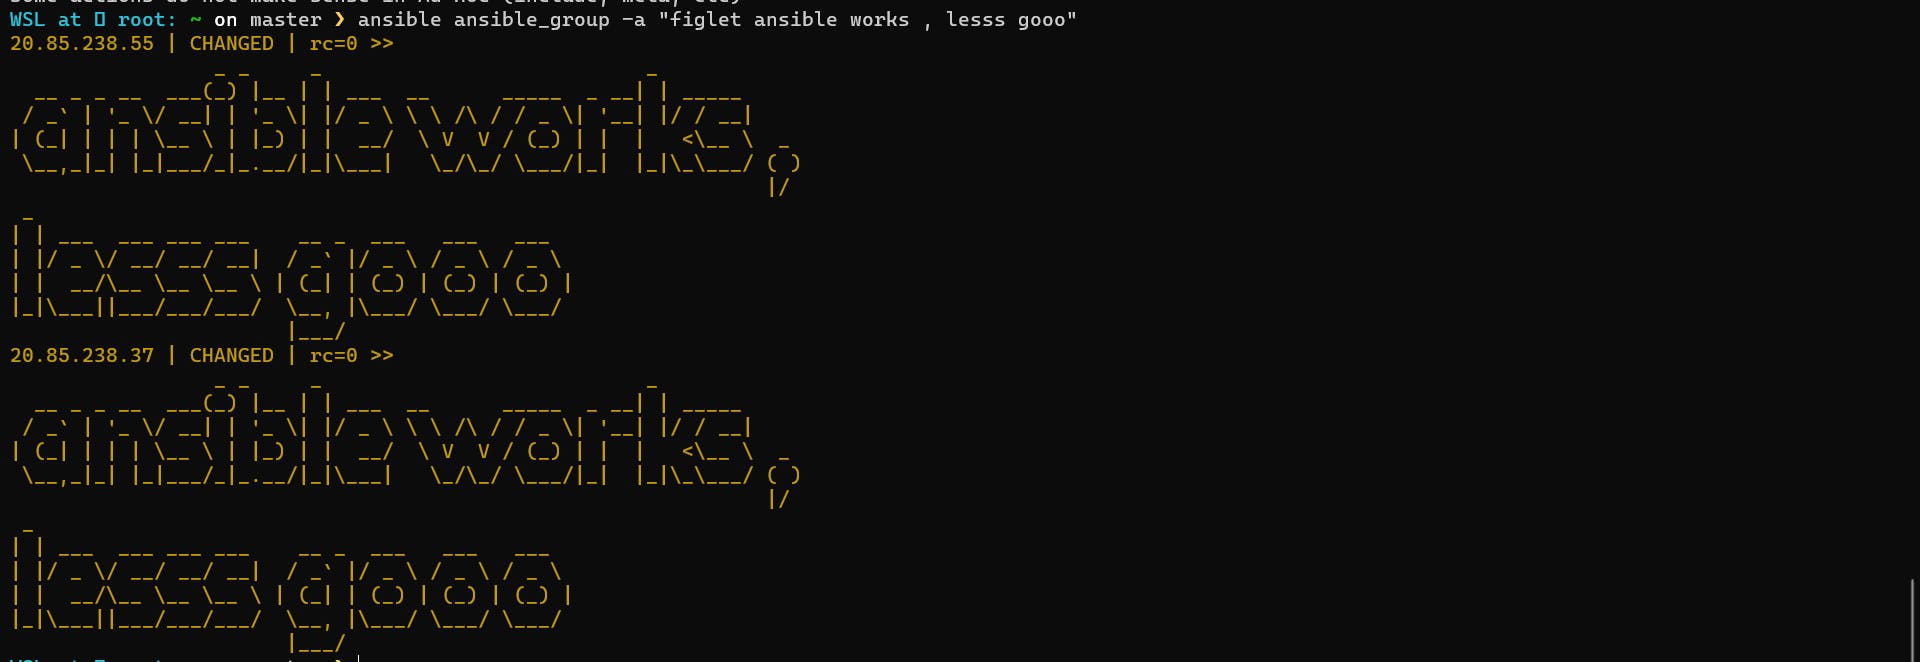
As you can see, ansible executed the command we told it to execute in both instances , you use slicing and tell ansible to only execute in the desired instances, for example
ansible <group_name>[0] -a "touch haah.txt"
This will only create the file in the first instance. Now let's go to something cooler.
Ansible modules
The module is a single command which will be executed one at a time. There is something known as an Ansible playbook, it is a set of modules. The modules library can stay on any machine without the need for a server or a daemon. For using a module using the ansible command line we pass a -m argument. Let's try to update the package figlet we just installed using ad hoc commands. Type the following
ansible <group_name> -b -m apt -a "pkg=figlet state=latest"
After typing this you can see in your terminal that the package has been updated or if it is up to date. pkg=figlet will show the figlet package and the state=latest will update it, you can also use state=present for installing new packages or state=absent for deleting a pkg. Let's try to add a user using a module, type the following
ansible <group_name> -b -m user -a "name=npc"
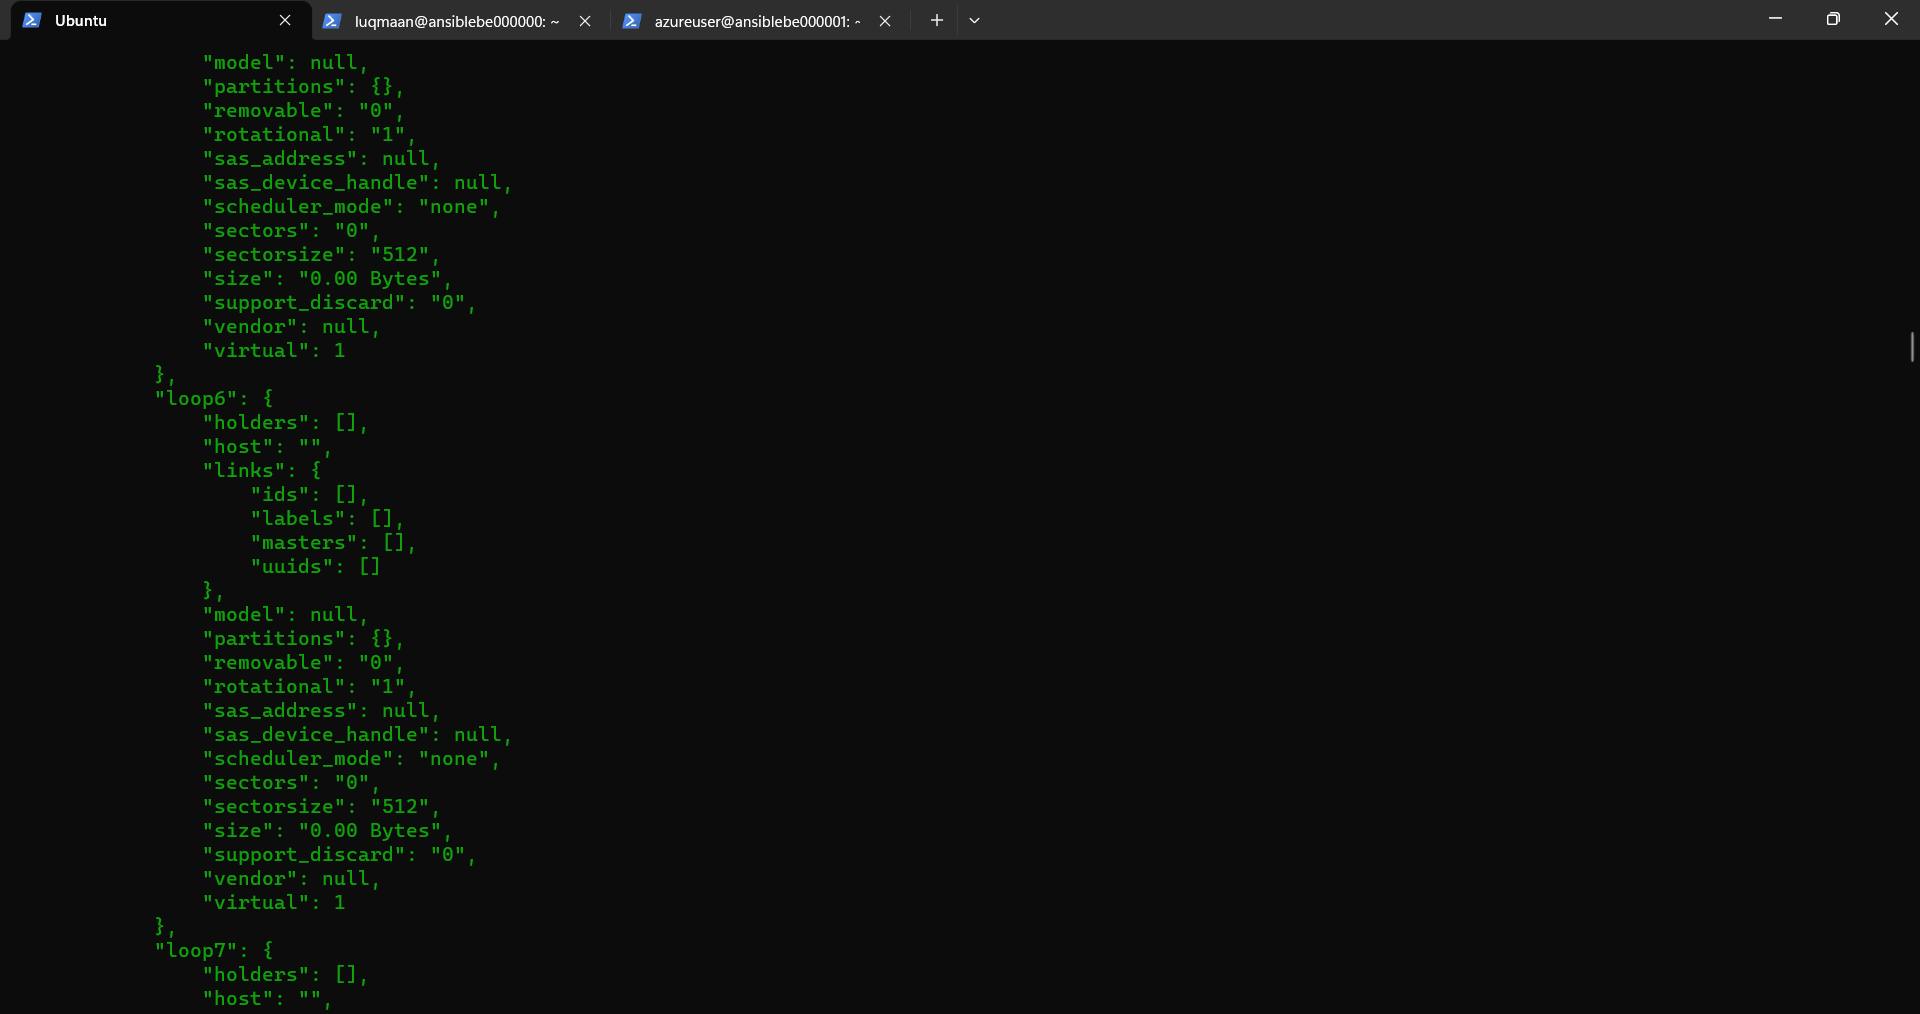
And BAAM!!! the user has been created. You can go to the instance and check it out by typing su - <username> . If you want to know every information about your instances you can do that with the module, type
ansible <group_name> -m setup
After typing that you should get a result something similar to this
You can use a wide range of modules to perform a wide range of tasks, take a look at all the modules: https://docs.ansible.com/ansible/2.9/modules/list_of_all_modules.html
Well, give yourself a pat or a dinner since you came this far.
Conclusion
I hope you learned what ansible is and the basics of working with it. There are more topics to cover but I'll leave that to upcoming blogs. If you have any doubts you can ask them in the comment section or connect with me on my socials. Well, that's the end of it, now your work is to go and experiment. Have a nice day ;)